fbpx Stain Blocker | General Finishes

Stain Blocker

Stain Blocker is General Finishes' revolutionary water-based stain blocking primer for interior projects. Stain Blocker can be used to protect pigmented finishes from stain, dye and wood tannin bleed-through. Use over an existing finish, raw wood or MDF as a base coat for light-colored General Finishes Milk Paint and Pigmented Polys.

General Finishes Stain Blocker is designed for effectiveness, not price point. This primer has a sophisticated resin system and an atypical formulation. Use on pieces where you are concerned about bleed-through. 

View Stain Blocker product overview video here.

Find A Store Compare Similar Products
General Finishes Water Based White Primer Stain Blocker, Quart

Instructions

Step 1: Preparation

All wood projects require preparation sanding, and all existing finishes require prep cleaning and sanding. If you skip this critical step, your finish may fail.

Preparation for Raw Wood or Stained Raw Wood Projects 
See our video: How to Prep Sand Raw Wood

  1. Sanding Schedule: 120-grit followed by 150- or 220-grit
  2. Remove dust with a water-dampened rag or oil-free tack cloth.
  3. Let dry completely before applying GF product.

WARNING: Do not over-sand with fine-grit sandpapers; this will close and seal the wood grain, preventing ideal color absorption. Also, do NOT use steel wool with water-based finishes; the particles will get trapped in the finish and rust.


Preparation for Projects with an Existing Finish (Sealed Surface)
For high-use areas with heavy grime build-up and oil from hands, give your project a deeper cleaning.
See our video: How to Prepare Existing Finishes

  1. Scuff clean with a Scotch Brite™ pad and a 50:50 mix of denatured alcohol and water. Dry 1-2 hours. Avoid cleaning with products containing phosphates (salt), which can linger in the substrate and produce a white haze. If your project requires a deeper cleaning, see Power Prep Cleaning Highly Used Existing Finishes below.
  2. Sand lightly with a fine-grade (220-320) foam sanding pad.
  3. Remove dust with a vacuum, compressed air, an oil-free tack cloth or a water-dampened rag.
  4. Let dry completely before applying General Finishes product.

Power Prep Cleaning Highly Used Existing Finishes
For high-use areas such as kitchen cabinets or table tops with heavy grime build-up and oil from hands, give your project a "Power" clean.
See our video: How to Power Prep Existing High Use Finishes for Stain or Paint

  1. Scrub clean with a detergent, such as Spic and Span or Dawn, using a Scotch Brite™ pad.
  2. Rinse well with water.
  3. Scrub clean with a Scotch Brite™ pad and a 50:50 mix of denatured alcohol and water. Dry 1-2 hours.
  4. Sand lightly with a fine-grade (220-320) foam sanding pad.
  5. Remove dust with a vacuum, compressed air, an oil-free tack cloth or a water-dampened rag.
  6. Let dry completely before applying General Finishes product.


Alternative Cleaning Solutions For Existing Finishes (Not as aggressive or effective as denatured alcohol; requires rinsing.) 

  • 50:50 mix of bleach and water 
  • 50:50 mix of vinegar and water
  • Mineral spirits can be used when working with water-based products, but only if the surface is thoroughly rinsed and allowed to dry for 72 hours.
  • If you use with products containing phosphates (salt), which can linger in the substrate and produce a white haze, be sure to rinse thoroughly. 


Step 2: How To Apply General Finishes Stain Blocker

General Finishes Stain Blocker is our strongest primer for light colored paints and acts as a chemical barrier that adheres well to prepped interior raw wood and previous existing finishes. Two coats are required. The first coat will absorb bleed-through which can cause a slight color change to gray, and the second coat will seal the bleed-through.

Stain Blocker Application Steps

  1. Stir paint to reincorporate solids that have settled to the bottom of the can before and throughout the application process.
  2. Thinning: Do not thin.
  3. Apply 2 coats of Stain Blocker under all light paints. 
    • Hand application: Apply using a synthetic bristle brush, foam brush, paint pad applicator or roller.
    • Spray application: Before spraying, strain paint through a medium-mesh filter. Spray wet films at 3-5-mil thickness. HVLP: 1.8mm-2.0mm spray tip, medium air cap. Verify tip sizes with your equipment supplier. See our general guide for spray tip sizes. Keep your gun at a 90° angle, 6-8" from the surface. On large, flat areas, use wet, even patterns 6-8" wide. For narrow surfaces, reduce the fan pattern to 2-3" wide to reduce overspray. Overlap each pass 25% to conceal lines. Wear a full filter (NIOSH/MSHA approved) respiratory & eye protection and work in a ventilated space. Visit this FAQ for more information on spraying techniques.
    • Face frames on cabinets: Stain Blocker can be applied successfully to cabinet face frames, edges or drawers with a brush, pad or small cabinet-specific roller such as Whizz or AllPro brand.
  4. Dry 2+ hours between coats and before topcoat in ideal conditions: 70°F/20°C; 50-70% humidity. Be sure to allow adequate dry time. Increase dry time if: 
    • Humidity is over 80%
    • Thick coats are applied
    • Applying over a previously existing finish
    • Applying over products from other brands
    • Layering General Finishes water- and oil-based products:
      • Water over oil: Let oil-based products dry 72+hrs before applying water-based products
      • Oil over water: Let water-based products dry 24+hrs before applying oil-based products
  5. Finish sand between coats with a fine-grade (220-320) foam sanding pad to improve smoothness and adhesion.
  6. Remove dust with a vacuum, compressed air, an oil-free tack cloth or a water-dampened rag.
  7. Apply 2-3 coats of paint and then seal with 3 coats of topcoat.

Cure Time
Water-based finishes cure and harden for full use after 21 days in ideal conditions. Avoid placing heavy objects on surfaces that have not completely cured. Treat gently, and do not clean with commercial products during the curing period.

What else you need to know:

  • DO NOT tint Stain Blocker or mix with any paint, stain or topcoat. Contamination from other finishes will cause product failure.
  • Interior use only under pigmented finishes.
  • Stain Blocker does not adhere to melamine.

Warning: Do not use water-based products with Linseed Oils or Danish Oils.

Cleanup of Stain Blocker

Application tools and materials containing water-based products can be cleaned with soap and water immediately after use. DO NOT use General Finishes Brush & Gun Cleaner.

Product Spills
Spills may be able to be removed from fabric and carpet if cleaned immediately with soap and water.

Storage of Water Based Products

Please be mindful of the manner in which water-based products are stored and how long they have been in storage. They not a forever product. 
 

Life of Product
Water-based products do not last forever, even when unopened. General Finishes products are best used within 1 year. However, the life of the product may be extended several more years with proper care and storage (see Storage Tips below).

Water-based products can last 3-5 years if the can is unopened, in good condition and stored in correct temperatures.

Product that is 3 years old will not look like product that is 6 months to 1 year old. You will see more stratification or separation as the product ages. Always stir thoroughly before using. 


Foul Smell
If your product has a foul smell, it is contaminated and no longer in useable condition.


Clumps & Settling
Gravity can cause some solids to settle on the bottom of the can and slight separation on the top. This is normal. If working with older product stir with a paint mixing attachment on a drill.

If the solids dissolve and clumps smooth out after mixing from the bottom, the product is in good condition for use.

Inability to reincorporate large, chunky lumps after stirring for several minutes is an indication that the product has frozen and can no longer be used.


Storage Tips
See video tutorial: Tips on Storing Leftover Finishes
Water-based finishes crystalize and form a skin due to evaporation when the air-tight seal on a can is broken at first use. The following best practices will increase the life of your product:

  1. Pry open sealed lids with a paint can opener by hooking under the lid's rolled edge. The use of a screwdriver can disfigure the rim and lid, impairing a complete seal. 
  2. Keep lid closed while working. Pour what you will use into a bowl, paper cup, or plate, and close can lid as you work.
  3. Clean the chime of the can thoroughly with a paper towel before closing to create a complete seal. Product falling into the chime can be minimized by using a pouring lid, such as Fitsall. Avoid wiping used brushes on the lid.
  4. Pound the lid in place using a rubber mallet to avoid distorting the chime or lid. Dents in the lid from direct contact with a hammer can impair a complete seal. Alternatively, place a flat piece of wood over can lid and firmly pound shut.
  5. Store in moderate temperatures. Avoid temperatures below 50°F/10°C or above 100°F/26°C. Keep from freezing. Frozen and heat-damaged product cannot be revitalized. Temperature-controlled spaces, such as a basement, are ideal for storage. Do not store product in an attic, garage, in direct sunlight, or next to something warm like a water heater or furnace.
  6. Store can upside down to create a liquid seal, minimize evaporation and reduce the chance of crystallization. Decant remaining product from the can before stirring. 
  7. Decant leftovers to a smaller container when the finish is almost used up. Alternative storage containers for water-based products are plastic FIFO bottles or glass bottles. Do not fill metal-lidded containers completely to prevent them from rusting.


The following water-based product mixtures can be stored:

  1. Product thinned with up to 15% General Finishes Extender or General Finishes Accelerator can be stored, with the exception of thinned General Finishes Water Based Wood Stain.
  2. Mixtures involving colors & sheens within the same product line, such as:
    • High Performance Satin + High Performance Gloss
    • Snow White Milk Paint + Coastal Blue Milk Paint
    • Amber Dye Stain + Merlot Dye Stain


The following product mixtures should NOT be stored:

  • Any water based product with thinned tap water; water often contains bacteria that will adversely affect stored paint.
  • Topcoat + Stain or Paint
  • Milk Paint + Chalk Style Paint
  • Water Based Wood Stain + Dye Stain

Furniture Care and Maintenance

Cure First
You have just finished applying a fine furniture finish. Treat gently until the paint or topcoat have fully cured. Allow 21 days for a water-based finish to cure and 30 days for an oil-based finish to cure before cleaning.

Regular Cleaning and Maintenance

  • Remove dust with a water-dampened cloth. Dust can build up over time and may scratch or dull finishes if not removed regularly. 
  • Remove fingerprints, cooking fumes and smoking residue with mild soap and water. These contaminants will not harm the finish, but they accumulate on surfaces and dull the original luster. 
  • As with all fine furniture finishes, avoid using furniture polish, cleaners or dusting sprays that contain silicone, alcohol, ammonia and anything acidic. Exception: We have successfully cleaned with Clorox wipes for occasional cleanups.
  • Clean up water, alcohol and food spills in a timely manner and use placemats & coasters to protect the finish.
  • Future finishes or touch-ups may not adhere properly or perform as desired over a contaminated surface. Some contaminants, such as silicone, seep through finish into the wood and often cannot be removed.
  • Avoid excessive exposure to direct sunlight, high temperatures or high humidity. These can damage furniture and finishes.

Warnings and Warranties

Stain Blocker Warnings and Warranties

Thinning
Do not thin Stain Blocker with anything but distilled water. Do not add more than 5% distilled water.

Compatibility 
Do not use water-based products with Linseed Oils or Danish Oils.

Limited Warranty
General Finishes products must be tested to your complete satisfaction before using. General Finishes will not be responsible for color satisfaction, misapplication, nor compatibility with other manufacturer's products. General Finishes will be responsible only for the cost of our products, and not for costs such as labor, damage or project replacement.


Contamination and Compatibility
Our finishes are engineered as a system and are compatible with each other. General Finishes cannot guarantee an ideal refinish when applying our products on top of or combined with another company's products or over surfaces that have been in contact with waxes, polishes or sprays containing contaminants such as silicone. Test for adherence and aesthetics before beginning.


FIRST AID: Seek immediate medical attention if symptoms occur due to the following. EYE CONTACT: Remove any contact lenses. Flush eyes with water for 20+ minutes while lifting upper and lower eyelids. SKIN CONTACT: Wash thoroughly after handling. INHALATION: Move to fresh air and loosen clothing. If not breathing, if breathing is irregular or if respiratory arrest occurs, provide artificial respiration or oxygen by trained personnel. INGESTION: Call physician immediately. Wash out mouth with water. Do not induce vomiting unless directed to do so by medical personnel. Never give anything by mouth to an unconscious person.


Prop 65 WARNING: This product can expose you to chemicals including Titanium dioxide, Crystalline silica, respirable powder, which are known to the State of California to cause cancer. For more information go to www.P65Warnings.ca.gov.


WARNING: CAUSES EYE AND RESPIRATORY TRACT IRRITATION.
WARNING: Keep out of reach of children. Use only with adequate ventilation. Avoid contact with eyes. Avoid breathing vapor or mist. Keep container tightly closed when not in use. Wash thoroughly after handling.

Specifications

Basic Features
Product Colors White
Base Type Water
Interior or Exterior Interior only
Tintable No
Type Stain Blocking Primer
Application
Coats 2 coats
Application Method Brush, Roll, Spray
Brushable Yes
Usable over existing finishes Yes
Sprayable Yes
Spray Tip Sizes HVLP 1.8mm-2.0mm
Dry Time
Dry Time - Touch 1+ hr
Dry Time - Recoat 2+ hr
Contents
Can Sizes Quarts, Gallons
Coverage 125-150 sq.ft./quart, 500-600 sq.ft./gallon
Technical Data
Viscosity Thick
Viscosity (cPs) 1500-2000
Weight Solids 35%
VOC US VOC
32.907 g/L

FAQs

Stain Blocker FAQs

*How Do I Prevent Light Colored Paint from Yellowing When Applying Water Based Topcoat?

All bright white paint will yellow slightly with time, even without topcoat. You have probably tried to touch up white woodwork in your home after several years and noticed that the new paint is brighter. But white and light paints can react if clear coated with a waterbased finish; water-based topcoats are reactive and may draw out substances in the wood such as tannins, dyes or unknown substances in existing finishes causing the topcoat to yellow. This is an industry-wide issue and can happen right away, years later or never.

There is no way to reliably predict yellowing ahead of time. Every existing finish is different and we rarely know the finishing provenance on a previously finished piece. Every tree is different; every piece of wood is unique. Wood can bleed tannins immediately after the topcoat dries or months later with a change in temperature that comes with a change in seasons. Oak, pine, mahogany, and Douglas Fir are particularly prone to bleed-through.

Throughout all of our testing, General Finishes water-based topcoats are clear drying over a non-reactive substrate such as plastic or metal but when applied to something as unpredictable as wood, it is best to play it safe. 

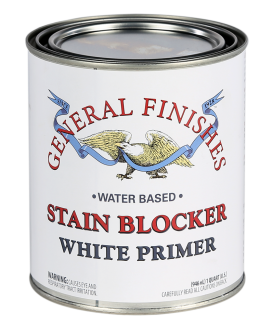
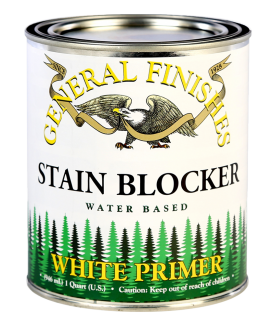
To reduce the occurrence of yellowing, we formulated Stain Blocker, a chemical stain and tannin blocking primer, and Brushable White Enamel. But the safest route is no use of topcoat over whites and light paint. As all of our white pigmented paints are self-sealing and do not require a topcoat, we warn users as follows:

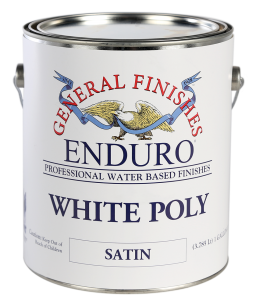
CAUTION: Do NOT use any water-based clear coat over bright whites such as GF Snow White Milk Paint, or GF White Poly as it may cause yellowing. Lighter-colored paints may alter slightly with a topcoat application, but the color shift is less noticeable. Any clear coat can become reactive over wood substrates or existing finishes, causing tannin or dye bleed-though regardless of priming. All of GF's white paints do NOT require a topcoat.

TIPS FOR PROTECTING YOURSELF AND PREVENTING YELLOWING

  1. Don't apply any clear coat when using light or white paints. Topcoat is perfectly fine over darker colors.
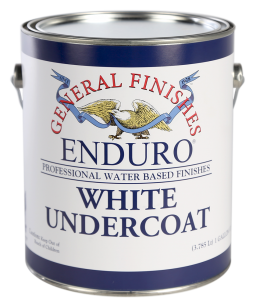
  2. Always prime white paint with a paint system: Gf recommends either 2 coats of Stain Blocker or White Undercoat. Over raw wood: Apply two coats of Stain Blocker or Enduro White Undercoat, then 1-2 coats of Brushable White Enamel, White Poly (spray only), or Milk Paint. Over an existing finish: Apply two coats of Stain Blocker, then 1-2 coats of Brushable White Enamel, White Poly (spray only), or Milk Paint. Always let any primer dry overnight. Many primers suggest a 3-hour dry time and that is not enough.
  3. We offer three types of self-sealing pigmented paint.
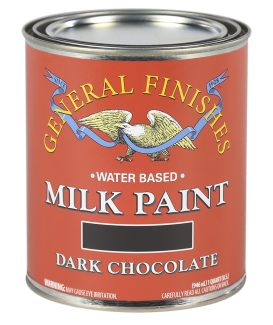
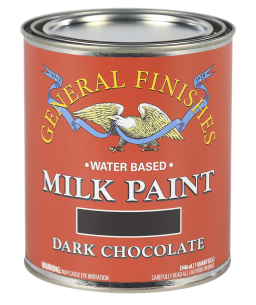
    1. Milk Paint: A clear topcoat is not required on our Milk Paint for increased durability. It is a self-sealing, exterior rated coating with very high-performance properties. However, higher sheen topcoats provide a smoother surface that is easier to clean for high use projects such as tabletops and kitchen cabinets. Topcoat is fine for darker colors, but not for light or white Milk Paint. In those cases, use Brushable White Enamel (available in Satin or Semigloss) or spray our pigmented White Poly (available in Flat Satin or Semigloss.)
    2. White Poly: Use a professional sprayable "white coat" such as our Enduro White Poly. It is a white paint with "increased topcoat properties", is a stand-alone finish when 3 coats are applied and does not require sealing with a topcoat.
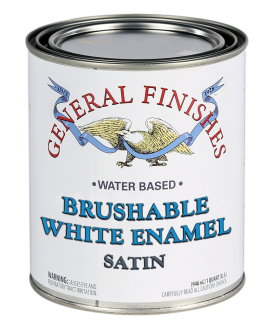
    3. Brushable White Enamel was developed as a stand-alone finish for those who want a bright white but do not use spray equipment.
  4. Use disclaimers in your contracts. Upcharge for the extra coats needed and never guarantee a white finish over a piece when the customer wants a topcoat. Here is a suggestion for your contracts: Terms of Agreement and Warranties: ________ (Initials) I have been informed that more coats are required when painting with bright whites, reds, greens or yellows. I understand that white paint can yellow over time and water-based topcoats can react with the substrate or existing finish under white paints causing yellowing, even if a stain-blocking primer is used. I have been informed that topcoat over white or light paints should NOT be used.
  5. Always test your project's ENTIRE finishing schedule (from cleaning to topcoat) on an inside door or a more hidden area of the piece. This does not help if the yellowing occurs later but you will at least know if there is an immediate problem.
  6. If you are working on period pieces such as a 1940's serpentine mahogany desk which were often finished in stain containing aniline dyes that cast a pinkish bleed-through under light paint, stay away from light colors. Not every piece of furniture is suitable for up-cycling with a light paint color. Pine, Mahogany, and furniture of the 1940's and 50's are a red flag.
  7. Last, not all manufacturer's topcoats are compatible with other finishes and may react with a color change. Always follow best practices by not rushing, and testing to your satisfaction first.

WHAT YOU NEED TO KNOW ABOUT WHITE PAINT:

  • Bright white paints can yellow over time with or without topcoat. It is the nature of oxidation.
  • The underlying finish or wood species can affect the final color of light paint.
  • Details and inside corners are difficult to cover with any paint color, but this property tends to be more noticeable with whites. This is a naturally occurring phenomenon in paint application and does not necessarily constitute a defect in the paint finish or your technique.
  • The more porous the paint (chalk paint vs an acrylic paint), the more likely that yellowing will occur. The topcoat is actually seeping through the spaces caused by the larger particles of filler that give chalk style paints their texture.
  • Whites have a lower “hide” quality and are more transparent than other colors. Most bright whites require additional coats to achieve the desired color and minimize color variation. This can increase the cost of paint finishing. Always include a clause in your contracts addressing the need for additional coats to achieve coverage.

IF YOU ARE A PAINTING PROFESSIONAL, DO NOT CARRY THE COST OF WHITE PAINT YOURSELF – include the cost of the increased labor for applying white paints with a fair, reasonable upcharge. White paints, even if they did not yellow, require more coats and high-quality primers to achieve coverage. See our video: http://bit.ly/GFVideoHowToAchieveBrightWhiteFinish

If your white cabinets have yellowed, we recommend prep cleaning and scuff sanding, applying a coat of General Finishes Stain Blocker primer, finish sand and recoat with another coat of paint.


Watch "How to Get a Bright White Finish" to learn more

*How Can I Improve Coverage When Using White Paint on Furniture?*

A primer is your best defense under light-colored paint.

Another technique to avoid the slight color change that sometimes occurs when applying topcoat is to add 10-15% of the paint you are using to your topcoat. This technique layers additional coats of color over your piece as well as providing the protection of a topcoat. If you don't like measuring, just add enough paint until you can see a bit of the hue in the topcoat. This method works with a brush or a spray gun.

To maintain the full-strength protection of the topcoat, DO NOT TINT YOUR FINAL COAT of topcoat.

Remember, NEVER EVER paint an existing piece of furniture with a light paint without proper preparation AND a stain blocking primer. Topcoats can activate tannins in the wood, or dyes in the previous finish, causing yellow or pink bleed-through. We recommend General Finishes Stain Blocker, which has been developed specifically for upcycling furniture and has proven to be 100% effective when two coats are applied, or Zinsser BIN.

Here is a sample finishing schedule:

  1. Prep clean and sand
  2. Three coats of paint (or four if needed)
  3. Two coats of topcoat mixed with 10-15% paint
  4. One coat of topcoat

VIDEO: How to update or refinish cabinets and woodwork light paint color using a sprayer.

*My Stain Blocker is Thick, Clumpy and Hard to Stir. Is This Normal?

Time and temperature play a roll in Stain Blocker's thickness and settling in the bottom of the can. What you are seeing is some of the fillers coagulating.

This is normal as long as it is soft on the bottom; it does not diminish its quality or effectiveness. You should be able to reincorporate the contents of the can - use a paint mixer if necessary because it is a thick, heavy product. However, you should not see any hard settle at the bottom of the can.

Related Products

How can I prevent bleed through on mahogany furniture from the 1920-1930’s?

Never guarantee a finish on this era of furniture. Inform your customers of this issue and steer customers away from using light colors. Never guarantee a finish on this era of furniture. Inform your customers of this issue and steer customers away from using light colors. Many mahogany pieces from the late 1920's to early 1930's have an aniline dye lacquer finish which can bleed through no matter how many times you paint or prime over it. Although ideal coverage over an aniline dye lacquer can never be guaranteed, the following two products have been known to minimize bleed through:

  1. A  stain blocking primer such as General Finishes Stain Blocker or Zinsser B-I-N 
  2. shellac seal coat will usually stop most of the bleeding

 
Note: If you are trying to cover red mahogany with a white you may never be able to stop the bleed through. Stain Blocker is most likely to stop the bleed-through of all options listed above because it was specifically engineered to block the most persistent bleed-through.


Tips from GF:

  1. Never guarantee a finish on this era of furniture. Inform your customers of this issue and steer customers away from using light colors.
  2. Clean the project and apply 2 coats of General Finishes Stain Blocker with a brush, roller or by spraying. The first coat will absorb contaminants in the wood, causing a color change during the first application, and the second will seal the contaminants. More information regarding Stain Blocker here.
  3. Another primer alternative is Zinsser B-I-N.
  4. Use a dark paint color - there are some pieces that will never work with al light paint.
  5. If none of this works, we recommend that you strip and refinish with a penetrating oil stain followed by a clear coat. 

Stripping Recommendations:
 

  1. Use a good quality citrus stripper or a soy gel stripper as they are more gentle than traditional chemical strippers.
  2. Remove any remaining finish with 150 grit sandpaper. 
  3. Once you have removed the old finish, wash the piece down with a 50/50 blend of denatured alcohol and water to remove any residual oils and waxes. 
  4. Once these stages have been completed, it is safe to use any type of wood stain to restore the original look of the piece.  

Related Products

Relevant Videos